Updated August 9, 2026. Added the quick-answer summary.
Quick answer
To create a GIF from HTML and CSS: load the page in headless Chromium, advance the animation clock in fixed steps (100ms per frame for 10fps), screenshot each tick, and encode the frames with gifski or FFmpeg. Or skip building that pipeline: POST your HTML to Pictify's HTML-to-GIF API with a duration and fps; it handles the time-stepping and encoding, hosts the GIF on a CDN, and returns a URL. The free tier covers 50 renders/month with no credit card. The rest of this guide covers both paths in detail.
The case for rendering GIFs from code
GIFs refuse to die. Email clients don't support video. Slack previews don't autoplay MP4s. GitHub READMEs need inline animation. Product managers want "something that moves" in the launch announcement.
The traditional workflow (screen record, open Photoshop, trim, export, realize it's 18MB, re-export at lower quality, accept the pixel mush) is painful. And it's completely manual. Change one word in the UI and you redo the whole thing.
There's a programmatic alternative: define your animation in HTML/CSS, render it frame-by-frame in a headless browser, and encode the frames as a GIF. The result is pixel-perfect, reproducible, and automatable. Change a variable, re-render, get a new GIF.
This guide covers the full pipeline, from CSS @keyframes to a CDN-hosted GIF URL, including the frame capture mechanics, encoding tradeoffs, and the edge cases that make GIF generation surprisingly tricky.
How HTML-to-GIF rendering works under the hood
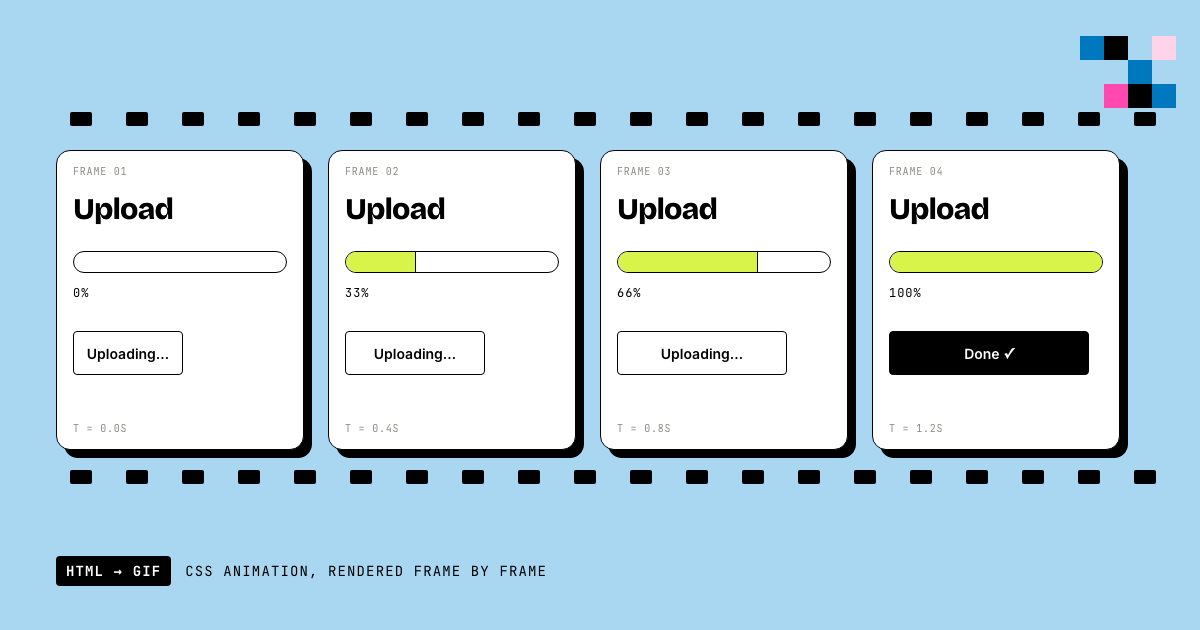
A GIF is a sequence of frames with timing metadata. To create one from HTML, you need to:
- Load your HTML in a browser engine
- Advance time by a fixed interval
- Capture a screenshot at each tick
- Encode the screenshots into GIF frames
            ┌──── 0ms ──── 100ms ──── 200ms ──── 300ms ────┐
            │                                                │
  HTML+CSS  │  Frame 0    Frame 1    Frame 2    Frame 3      │
  animation │  capture    capture    capture    capture       │
            │     │          │          │          │          │
            └─────┼──────────┼──────────┼──────────┼──────────┘
                  ▼          ▼          ▼          ▼
              ┌─────────────────────────────────────┐
              │        GIF Encoder (gifski/FFmpeg)   │
              │  Frame 0 + Frame 1 + Frame 2 + ...  │
              │  → color quantization (256 colors)   │
              │  → LZW compression                   │
              │  → loop metadata                     │
              └─────────────────────┬───────────────┘
                                    ▼
                              animated.gif
The critical detail: CSS animations are time-based, not frame-based. A @keyframes animation with duration: 2s doesn't produce a fixed number of frames; it interpolates smoothly at whatever frame rate the browser renders. To capture it as a GIF, you need to tell the browser "advance time by exactly 100ms and give me a screenshot" repeatedly.
Puppeteer doesn't have a built-in "advance time" API. You have to either:
- Real-time capture: Run the animation at normal speed and screenshot at intervals. Simple but slow: a 3-second animation takes 3+ seconds to capture.
- Controlled time stepping: Override
requestAnimationFrameand CSS animation timing to step through frames deterministically. Faster and more reliable, but complex to implement.
With the Pictify GIF API, you send the HTML and specify duration and fps. The service handles the time-stepping and encoding internally.
Quick start: your first GIF
Using the Pictify API
const response = await fetch('https://api.pictify.io/gif', {
  method: 'POST',
  headers: {
    'Content-Type': 'application/json',
    'Authorization': `Bearer ${process.env.PICTIFY_API_KEY}`,
  },
  body: JSON.stringify({
    html: `
      <div style="width:400px;height:300px;display:flex;align-items:center;
                  justify-content:center;background:#0b0b1f;font-family:system-ui">
        <div style="width:60px;height:60px;border:4px solid #4ade80;
                    border-top-color:transparent;border-radius:50%;
                    animation:spin 1s linear infinite"></div>
      </div>
      <style>
        @keyframes spin { to { transform: rotate(360deg); } }
      </style>
    `,
    width: 400,
    height: 300,
    duration: 2000,
    fps: 15,
  }),
});

const { url } = await response.json();
// url → https://media.pictify.io/xyz.gif (CDN-hosted, permanent)
Using Puppeteer (DIY approach)
If you need full control over the rendering pipeline:
const puppeteer = require('puppeteer');
const GIFEncoder = require('gifencoder');
const { createCanvas, Image } = require('canvas');
const fs = require('fs');

async function htmlToGif(html, { width, height, duration, fps }) {
  const browser = await puppeteer.launch({ headless: 'new' });
  const page = await browser.newPage();
  await page.setViewport({ width, height });
  await page.setContent(html, { waitUntil: 'networkidle0' });

  const frameCount = Math.ceil((duration / 1000) * fps);
  const frameDelay = 1000 / fps;

  const encoder = new GIFEncoder(width, height);
  const stream = encoder.createReadStream();
  const output = fs.createWriteStream('output.gif');
  stream.pipe(output);

  encoder.start();
  encoder.setRepeat(0);    // loop forever
  encoder.setDelay(frameDelay);
  encoder.setQuality(10);  // lower = better quality, slower

  for (let i = 0; i < frameCount; i++) {
    const screenshot = await page.screenshot({ type: 'png' });

    // Decode PNG and write frame to GIF encoder
    const img = new Image();
    img.src = screenshot;
    const canvas = createCanvas(width, height);
    const ctx = canvas.getContext('2d');
    ctx.drawImage(img, 0, 0);
    encoder.addFrame(ctx);

    // Wait for next frame
    await page.waitForTimeout(frameDelay);
  }

  encoder.finish();
  await browser.close();

  return new Promise(resolve => output.on('finish', () => resolve('output.gif')));
}
This works but has significant problems at scale:
- It's real-time. A 5-second GIF takes 5+ seconds to capture. You can't parallelize within a single page.
- Frame timing is imprecise.
page.waitForTimeout()doesn't guarantee exact timing; JS event loop delays add jitter. - Memory accumulates. Each PNG screenshot sits in memory until the GIF is encoded. A 60-frame GIF at 1200×630 uses ~150MB of PNG buffers.
- Color quantization is naive.
GIFEncoderuses a simple median-cut algorithm. For complex images, the 256-color palette produces visible banding.
CSS animations that work well as GIFs
GIF has constraints that affect which animations look good. The 256-color limit means photographic content and complex gradients will band. Solid colors, simple shapes, and text animations render cleanly.
Animation 1: Terminal typing effect
<div style="width:600px;height:200px;padding:32px;background:#1e1e1e;
            font-family:'Courier New',monospace;display:flex;align-items:flex-start;
            flex-direction:column;gap:8px">
  <div style="color:#4ade80;font-size:14px">
    <span style="color:#666">$</span>
    <span style="overflow:hidden;white-space:nowrap;display:inline-block;
                 width:0;animation:type 1.5s steps(25) 0.3s forwards;
                 border-right:2px solid #4ade80">
      npx pictify render template --vars '{"name":"World"}'
    </span>
  </div>
  <div style="color:#ffc480;font-size:14px;opacity:0;animation:fadeIn 0.3s 2s forwards">
    Image saved → https://cdn.pictify.io/abc.png
  </div>
</div>

<style>
  @keyframes type { to { width: 420px; } }
  @keyframes fadeIn { to { opacity: 1; } }
</style>
Render with duration: 3000, fps: 15. This produces a clean ~80KB GIF that loops well because the last frame holds the completed output.
Animation 2: Animated progress/metric
<div style="width:500px;height:250px;padding:40px;background:#0b0b1f;font-family:system-ui">
  <p style="color:#9ca3af;font-size:14px;font-weight:600;margin:0 0 12px">Monthly Renders</p>
  <div style="font-size:48px;font-weight:900;color:#fff;margin:0 0 20px;
              font-variant-numeric:tabular-nums">
    <span style="display:inline-block;animation:countUp 2s ease-out forwards"
          id="counter">0</span>
    <span style="color:#4ade80;font-size:24px;margin-left:8px;
                 opacity:0;animation:fadeIn 0.3s 1.8s forwards">+23%</span>
  </div>
  <div style="height:8px;background:#1f2937;border-radius:4px;overflow:hidden">
    <div style="height:100%;width:0;background:linear-gradient(90deg,#4ade80,#22c55e);
                border-radius:4px;animation:fill 2s ease-out forwards"></div>
  </div>
</div>

<script>
  const el = document.getElementById('counter');
  const target = 12847;
  const duration = 2000;
  const start = performance.now();

  function update(now) {
    const progress = Math.min((now - start) / duration, 1);
    const eased = 1 - Math.pow(1 - progress, 3); // ease-out cubic
    el.textContent = Math.floor(target * eased).toLocaleString();
    if (progress < 1) requestAnimationFrame(update);
  }
  requestAnimationFrame(update);
</script>

<style>
  @keyframes fill { to { width: 72%; } }
  @keyframes fadeIn { to { opacity: 1; } }
</style>
This combines CSS animations with JavaScript for the counter. The JS requestAnimationFrame loop runs in the headless browser, and the GIF capture picks up the interpolated values at each frame.
Animation 3: Multi-step feature tour
<div id="root" style="width:600px;height:400px;background:#1e1e1e;font-family:system-ui;
                       color:#fff;position:relative;overflow:hidden">
  <!-- Slides positioned absolutely, animated in sequence -->
  <div class="slide" style="animation:slideShow 6s ease-in-out infinite">
    <div style="padding:60px;text-align:center">
      <div style="font-size:48px;margin-bottom:16px">1</div>
      <h2 style="font-size:28px;margin:0 0 8px">Design your template</h2>
      <p style="color:#9ca3af;font-size:16px">Use the visual editor or write HTML/CSS directly</p>
    </div>
  </div>
</div>

<script>
  const steps = [
    { num: "1", title: "Design your template", desc: "Visual editor or raw HTML/CSS" },
    { num: "2", title: "Connect your data", desc: "API variables, CSV import, or webhook" },
    { num: "3", title: "Render at scale", desc: "One image or ten thousand, same API call" },
  ];

  const root = document.getElementById('root');
  let step = 0;

  setInterval(() => {
    step = (step + 1) % steps.length;
    const s = steps[step];
    root.innerHTML = `
      <div style="padding:60px;text-align:center;animation:fadeSlide 0.5s ease-out">
        <div style="font-size:48px;margin-bottom:16px;color:#4ade80">${s.num}</div>
        <h2 style="font-size:28px;margin:0 0 8px">${s.title}</h2>
        <p style="color:#9ca3af;font-size:16px">${s.desc}</p>
      </div>
    `;
  }, 2000);
</script>

<style>
  @keyframes fadeSlide {
    from { opacity: 0; transform: translateY(20px); }
    to { opacity: 1; transform: translateY(0); }
  }
</style>
Render with duration: 7000, fps: 12 to capture all three slides with transitions.
GIF optimization: the 256-color problem
GIF supports a maximum of 256 colors per frame. If your HTML uses gradients, photos, or many colors, the encoder must quantize the palette, and the results can be ugly.
Strategies for clean GIFs:
- Use flat colors. Solid backgrounds, solid text, no gradients. A dark background (#1e1e1e) with white text and one accent color (#4ade80) looks crisp.
- Limit your palette. Fewer than 64 distinct colors produces the smallest files with the best quality.
- Avoid photographic content. Photos in GIFs look terrible. If you need a photo background, apply a heavy blur or dark overlay to reduce color complexity.
- Use a better encoder. Default GIF encoders (like
gif.jsorGIFEncoder) use simple quantization.gifskiuses perceptual color quantization and produces significantly better output at the same file size.
File size rules of thumb:
| Dimensions | FPS | Duration | Flat colors | Gradient/photo |
|---|---|---|---|---|
| 400×300 | 10 | 2s | ~50-100KB | ~200-500KB |
| 600×400 | 15 | 3s | ~150-300KB | ~500KB-1.5MB |
| 800×600 | 15 | 5s | ~400KB-1MB | ~2-5MB |
If your GIF exceeds 1MB, consider: reducing dimensions, lowering FPS to 10, shortening duration, or simplifying the visual design.
When GIF is the wrong format
GIF has real limitations. Consider alternatives:
- WebP (animated): Same use case as GIF but with 26-color palette, alpha transparency, and 25-35% smaller file sizes. Supported in all modern browsers but NOT in email clients.
- MP4/WebM: For anything over 5 seconds, video is dramatically smaller. A 10s animation that's 3MB as GIF is 200KB as MP4. Use video if your target supports it.
- CSS animation (live): If the animation is for web display and doesn't need to work in email/Slack/GitHub, just ship the CSS animation directly. No image file needed.
- Lottie (JSON): For vector animations, Lottie files are tiny and resolution-independent. But they require a player library.
Use GIF when:
- Email compatibility is required (marketing emails, transactional emails)
- The target platform doesn't support video embeds (GitHub README, Slack previews, Notion)
- The animation is short (< 5s) and simple (< 5 colors)
- You need a universal format that works everywhere without JavaScript
Automating GIF generation in CI/CD
The highest-value use case: generate GIFs automatically as part of your build pipeline.
# .github/workflows/generate-gifs.yml
name: Generate Demo GIFs
on:
  push:
    paths:
      - 'docs/demos/**'

jobs:
  render:
    runs-on: ubuntu-latest
    steps:
      - uses: actions/checkout@v4
      - uses: actions/setup-node@v4
      - run: node scripts/render-demo-gifs.js
        env:
          PICTIFY_API_KEY: ${{ secrets.PICTIFY_API_KEY }}
      - uses: actions/upload-artifact@v4
        with:
          name: demo-gifs
path: docs/gifs/// scripts/render-demo-gifs.js
const fs = require('fs');
const path = require('path');
const DEMOS_DIR = './docs/demos';
const OUTPUT_DIR = './docs/gifs';
async function renderDemos() {
const files = fs.readdirSync(DEMOS_DIR).filter(f => f.endsWith('.html'));
for (const file of files) {
const html = fs.readFileSync(path.join(DEMOS_DIR, file), 'utf-8');
const name = file.replace('.html', '');
console.log(`Rendering ${name}...`);
const response = await fetch('https://api.pictify.io/gif', {
method: 'POST',
headers: {
'Content-Type': 'application/json',
'Authorization': `Bearer ${process.env.PICTIFY_API_KEY}`,
},
body: JSON.stringify({
html,
width: 600,
height: 400,
duration: 3000,
fps: 12,
}),
});
const { url } = await response.json();
// Download and save locally for Git
const gifResponse = await fetch(url);
const buffer = Buffer.from(await gifResponse.arrayBuffer());
fs.writeFileSync(path.join(OUTPUT_DIR, `${name}.gif`), buffer);
console.log(` → ${name}.gif (${(buffer.length / 1024).toFixed(0)}KB)`);
// Rate limit
await new Promise(r => setTimeout(r, 500));
}
}
fs.mkdirSync(OUTPUT_DIR, { recursive: true });
renderDemos().then(() => console.log('Done.'));Now every time you change a demo HTML file, the pipeline regenerates the GIF. Your documentation stays in sync with your code automatically.
Next steps
- HTML to GIF converter: try it in the browser
- HTML to Image guide: static image rendering
- Get your API key: start rendering
- API docs: GIF endpoint: full reference
Built with Pictify, the programmable image engine for developers.
Ship documents, images and video from one template.
50 renders a month on the free tier. No card, no watermark.
Start free